You have no items in your shopping cart.
How to Guide: High Wind Installation
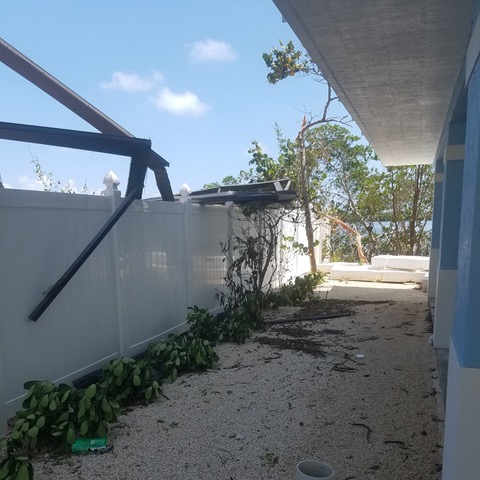
At Weatherables, we only use the highest quality materials to manufacture our fencing and railing products. From our durable vinyl to our aluminum inserts, we don’t hold back on quality.
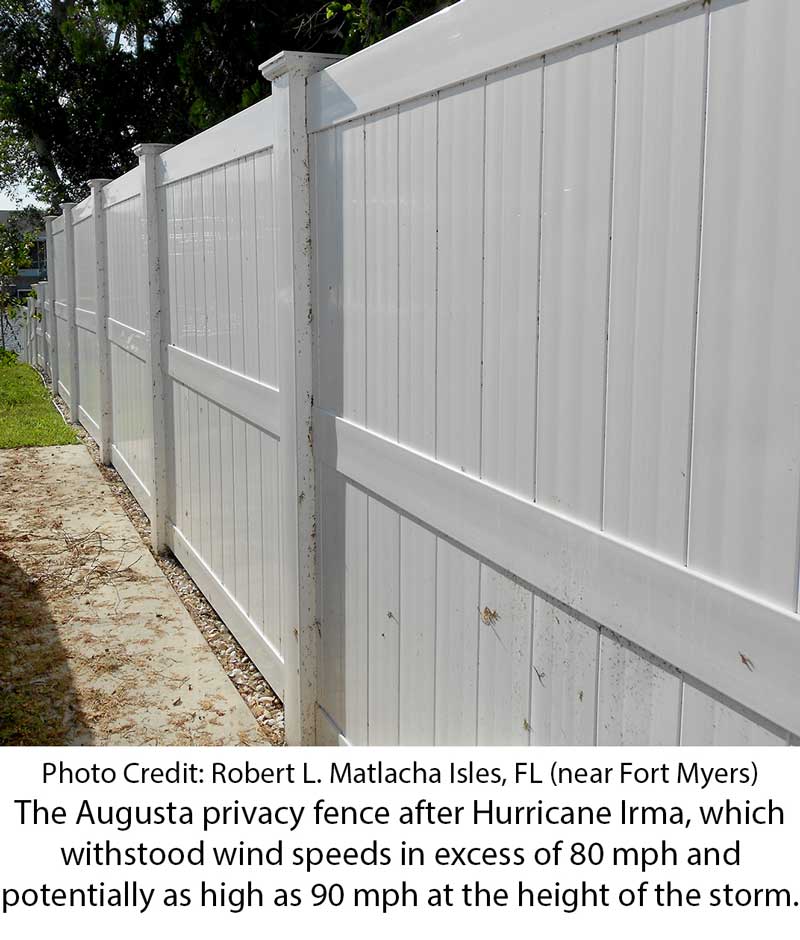
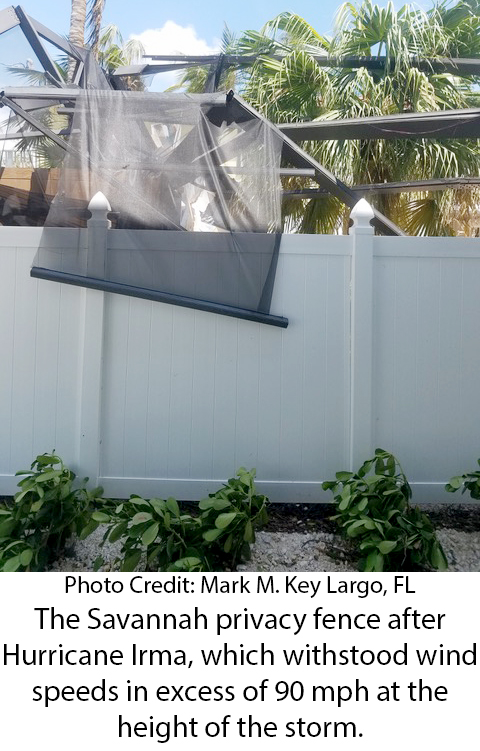
Did you know that many of our fencing panels can also withstand winds up to 130 mph*? It’s true! In fact, all of our privacy fences up to 6 feet tall have been engineer tested and can be installed to withstand high winds. Below is a guide to walk you through the process of installing your Weatherables privacy fence to withstand winds of up to 130 mph.
Before you get started, we recommend you read through our previous blog post Vinyl Fencing Installation Made Easy: Get It Done in 6 Easy Stages. Also, for detailed instructions about high-wind installation for your particular fencing style download our installation instructions.
High Wind Installation:
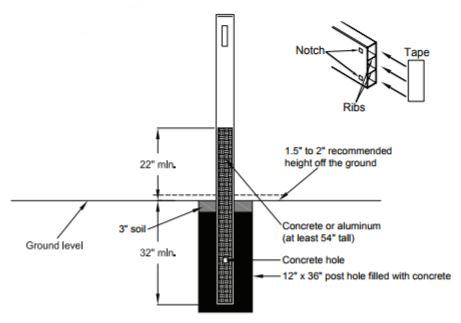
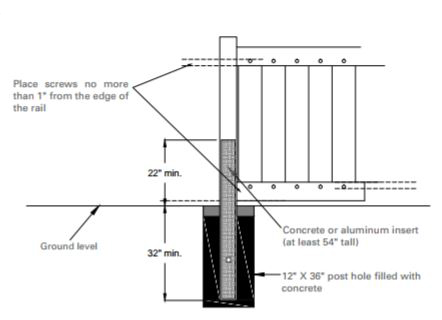
1. First, install the posts at least 3-feet into the ground with concrete. 5” posts require a 12” diameter hole and will need two 80lb. bags of concrete. To withstand high winds, the posts must be reinforced with aluminum or concrete.
A. If you are reinforcing for high wind using an aluminum insert, you should install it with the post in this step. The aluminum insert will need to be at least 22 inches above the ground when installed. You can then skip to step # 5.
B. If you are using concrete to backfill your posts, this will need to be done after the panels are installed.
2. When installing the panel, be sure to tape off the bottom rail with duct tape or similar heavy duty tape. This will keep the concrete from entering the rail which could burst the rail as it expands and contracts due to weather.
3. Install the panel as outlined in the installation guide.
4. Once your panels have been installed, you are ready to back-fill your posts with concrete for high wind. Fill the posts with concrete to at least 22” above the ground.
5. Install one #10 x 1" self-tapping stainless steel screw into the top and bottom of each 6" wide picket to secure the picket to the top and the bottom rails (see the installation guide for your specific model and the screw placement).
A. For Panel Privacy (13-7/8” pickets) use 2 screws on top and bottom of the picket.
B. Screws should be placed no more than 1" from the top or bottom of the rail. Be careful not to over tighten the screws. We suggest using screw caps to protect the heads of the screws and maintain the look of your fence panel.
6. Install one #10 x 1” screw into each side of the top rail inside the post.
Please note that all steps must be taken for panels to withstand high winds up to 130 mph. Some models may vary on wind load, as seen here:
|
Largo Privacy Fencing |
120 MPH sustained winds with gusts up to 137 MPH |
|
Clearwater Privacy Fencing |
110 MPH sustained winds with gusts up to 130 MPH |
|
T&G Privacy Fencing |
110 MPH sustained winds with gusts up to 130 MPH |
Weatherables offers the most durable vinyl fencing in the industry. If you have any questions about our products and their performance in high wind, call us at 888-743-3673 or complete this form and we'll give you a call within 1 business day.
*All of our vinyl privacy fence panels (up to 6' in height) have been engineered and tested to accommodate high wind loads. In order to withstand high wind loads, the additional installation steps outlined above must be followed. Please note, testing completed on a 6' x 8' size panel confirms that all tongue and groove picket privacy fences 6' and shorter will accommodate high wind loads. Although picket, pool, and semi-privacy fencing were not part of the wind test, they are considered to be strong enough for high winds because they allow wind to pass through the pickets.



Comments
Leave A reply