You have no items in your shopping cart.
Vinyl Fencing Installation Made Easy: Get It Done in 6 Easy Stages

Installing a vinyl fence on your property can have numerous benefits, chief among them being increased privacy, safety and aesthetic appeal.
But what is the process actually like? Here are the six stages to easily guide you through installation. It should be noted, however, that the installation instructions which come with your product should always be followed closely, as this post is intended to give you a broad overview.
Also, it is advisable to read this guide in its entirety along with your installation instructions prior to beginning any work.
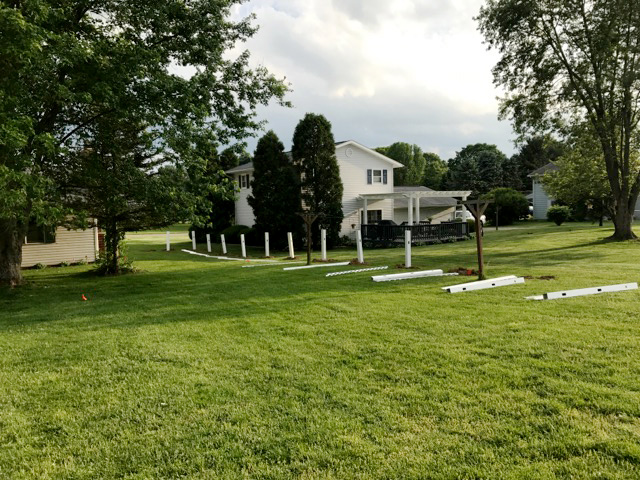
1. Prep Work
Before you begin your vinyl fence installation, you’ll want to make sure you’re properly prepared for all that’s to come.
First, you’ll need to follow any building codes for your area and obtain permits when necessary. Next, clear all obstructions from working areas for the project. Also, check utility lines and irrigation systems and mark them to avoid problems while excavating.
Finally, gather the proper tools and safety equipment, including items like:
- Concrete mix
- Post hole digger
- Shovel
- Tamping/spud bar
- Tape measure
- Level
- Rubber mallet
- Wooden stakes
- String
- String level
- Drill
- Wheel barrel
- Safety Glasses
- Gloves
With all of your tools in place, install line stakes with proper measurements and run a string line, marking the location for each post.
2. Gate Installation
Dtetermine the location of your gate first, then install the gate posts with the aluminum inserts. Check out the following links to see information about gate installation, hinge installation and latch installation.
The installed gates will set the height of the fence. Failing to begin with your gates can result in spacing problems during installation of the total vinyl fence and a lack of space for the gate.
Give a minimum of two inches of clearance between the bottom of the fence panel and ground to let the gate swing freely without obstruction.
3. Post Preparation
Now that your gates are installed, you are ready to continue your run of fencing.
When you have measured out and marked the location of the posts, dig the post holes:
- 12-inch diameter holes required for 5-inch posts
- 10-inch diameter holes required for 4-inch posts.
- Post holes should be 30-36 inches in depth, but local building codes will need to be cross-referenced.
The posts will need to be set with wet, pre-mixed concrete. You’ll need two 80 lb. bags of concrete for each 5-inch post, or two 60 lb. bags for each 4-inch post. For concrete alternatives, check out our Fast 2K.
4. Working With Post A
As your vinyl fence installation continues, you’ll want to designate your first post as Post A and the following post as Post B.
- Level and plum Post A, then fill the hole with concrete to four inches below ground level and make sure to work concrete into the concrete hole designed within the post to stabilize it. Install one post at a time and don’t get ahead of yourself to ensure proper fencing alignment as you proceed.
- After you cement Post A, you’ll need to insert Post B into its prepared hole but do not cement it at this time, as it will need to remain flexible.
- Next, install the fence panel into the routed holes of Post A. Refer to the instructions that came with your fence for instruction on your specific fence style. Be sure to use a spacer under the bottom rail so that your fence stays level during installation.
5. Working With Post B
Once the fence panel is installed into Post A, install the bottom and top rail into Post B, making sure to level and plum Post B.
- Level the top rail to ensure it is correctly placed and is level. Now, measure from Post A to Post B to make sure their distances are aligned with the specifications in your instruction sheet.
- Fill Post B’s concrete hole as well as the surrounding hole with concrete at this time to about four inches below ground level.
- For those in high wind areas, follow the additional steps found in the high wind installation instructions.
- Steps 4 & 5 will be repeated throughout the rest of installation.
6. Adding Picket and Post Caps
As your vinyl fence installation draws to a close, know that the most labor-intensive tasks are behind you at this point. For this stage, you will be installing picket caps (if necessary) and post caps.
For Picket caps:
- Press a bead of glue inside each picket and then press each picket cap down on top to secure them into place.
For Post Caps:
- Gluing the post caps is unnecessary and potentially problematic for the future, as you may want to change the post caps at a later time. Clear silicone caulk should instead be used in the inside corner of the post cap. This will secure the cap without permanently attaching it to the post.
- Once your post caps and picket caps are in place, you’ve successfully gone through all the stages needed for vinyl fence installation.
Additional Notes on How to Install Vinyl Fencing
For some styles, like The Halifax, a mid-rail will be incorporated along with top spindles. For mid-rail installation, make sure the larger holes found on the mid-rail are pointed toward the ground and the smaller holes are pointed upward.
For further instruction on installation, please see our video library.
Time to Get to Work!
If you have any questions about these stages or any of the products Weatherables offers, feel free to contact us. We’ll be happy to help!
Comments
Leave A reply